ONE RESPONSE TO “USE GOOGLE STEP 2 VERIFICATION FOR BETTER SECURITY IN GOOGLE ACCOUNTS”
Gmail is considered to be the most strongest account to break in. But recently its proved only a myth. We all know that protecting Gmail account is very much important in our routine life. Today we are going to discuss about the strongest way to secure your Gmail account. This is the best level of security you can expect from Gmail team. I tested it and now presently using it. It’s really awesome to use step 2 verification for my Gmail account.
First of all, Why we should mainly concentrate on protecting Gmail account is, its connectivity with all the services of Google which they provide. That means, with single Gmail id, you are accessing other services of Google like Android, Google Plus, Adsense, Adwords, Orkut, and a lot other services. So if you are using all of those services and want to protect your id, just follow the article to activate 2-step verification service by Gmail.
1) Login to your Google Account. You can Login either from Google.com or Gmail.com and after logging in, Just click on Account Settings as shown in below screenshot to go to the options page.
2) Now click on Using Step 2 Verification which is highlighted as number 2 in above click. Then you will be asked to click on a Start Setup Option in the next page.
3) After that you will be redirected to another page where you have to enter your mobile details. You can select the 2ways of setting up your step 2 verification process. One is land line or Mobile phone conformation and the other is the smart phones setup (eg: android, blackberry and iPhone). Take a look at the screenshot below. I have selected the normal phone text verification process since i am using a normal Nokia 5230 mobile.
4) As you can see in the above picture, the first red mark option is where we have selected our SMS or Voice Call option and at step 2 you have to enter your mobile number so it takes you further. I suggest SMS text message as shown in step 3. So after entering the phone and the option, click on the Send Code option (4). you will receive a code to your mobile, just enter it and verify. Click on next to move the next page.
5) This is the page where you are verified and asked to store some verification backup numbers in case you lost your number or phone. Just take a screenshot of those numbers and keep it with you. They are really useful when you have lost your mobile phone. Take a look at the screenshot below.
6) You have to enter another backup phone number to move to the next step. Put any friend’s number or your other alternate number to verify it. Now its done. You can directly access you turn your Step 2 Verification access.Just click on the Step 2 Verification as seen in below screenshot
7) As you can see in the above screenshot that all your account sources are verified. Now after click Turn on 2-Step Verification button above, you will warned that you will be logged out of all the access which you have from ( priestly . . bla bla . . .@gmail.com ) Google account. For a better idea, Look at the screenshot below.
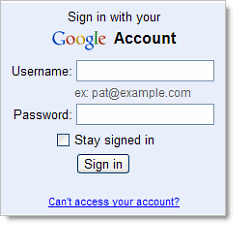
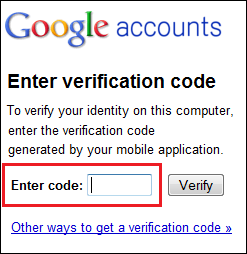
8) The next time the user signs in to their Google Apps account on a new browser or device, they enter their username and password as usual. They're then prompted with a second page to enter a verification code. When your user checks Remember verification for this computer, they're only prompted to enter a verification code once every 30 days per browser or after deleting their browser's cookies. Your users should not check this if they're at a public or shared computer.
The page view like this 1 - 2
1 ) 2)


No comments:
Post a Comment